Working with my organizing clients over the last two years has taught me loads about people. I’ve learned personal information about specific individuals, but also observed more generalizable truths as we tackled challenges. A few common issues crop up over and over, though. Several things can lead to setbacks and obstacles when organizing, but nothing is more frustrating than feeling ashamed. I’ve seen shame related to having too much stuff; shame about not working faster; shame about not wanting to let something go; shame about seeking outside help; shame about overwhelm. I’ve seen a lot… but because I’m the type of organizer who works side-by-side with a client, coaching them through the process, I also tend to give little nudges about these feelings.

In a beautiful way, working with clients facing similar struggles has helped me overcome my own shame about how things “should” be or look, or at what pace they “should” move. If you’re following me on Instagram, you would have seen that I posted about how “I broke my own rules and why I’m not freaking out about it” when promoting this as an upcoming post. And that’s because, as an organizer, I used to get really upset that my initial solution wasn’t working a few months later; and that upset would ultimately lead to feeling ashamed. How can I post tips on organizing if I can’t even follow my own rules about where stuff goes?
Well friends, the answer to that is; because there isn’t a single, one-and-done answer to how to be organized. Decluttering helps, but just like I’m not a static individual whose needs never change; my organizational strategies often need updating. And the fact is, I’m still trying to figure out what I’m super passionate about, so until then, I’ll keep trying new things; including my priorities and how I organize my stuff.
So this time around, when I noticed the clutter creeping in – to my tiny apartment bathroom – I wasn’t freaking out or feeling shame that I had failed. I listed out what wasn’t working and why and moved on until I could get nice enough lighting to photograph the process for you. 😉
Below I’ll outline that process and share a few tips about what details can get overlooked. I won’t be covering makeup here because I don’t keep makeup in my bathroom… it just seems unsanitary to me; but I will cover it in a future post!! I’m also not spending much time covering containment systems or products as they also deserve their own special write up.

What’s Not Working/Why
To get myself ready, I thought about what wasn’t working in the bathroom. For me that meant 1. it was visually unpleasant; 2. I was trying to store a lot of products that weren’t right for me anymore; and 3. I wasn’t giving enough space to my partner (we’ll call him the Physicist). As for why these things were causing problems, I noted that visual clutter makes things look less organized than they actually are; there simply wasn’t enough room for all the skincare I’d tried but wasn’t excited about; and my Physicist would put things back anywhere that was open because I hadn’t given him enough room for his things last time I organized. **Disclaimer: He’s more organized than I am; we were simply out of most of his things when I organized last and I didn’t plan properly for everything**
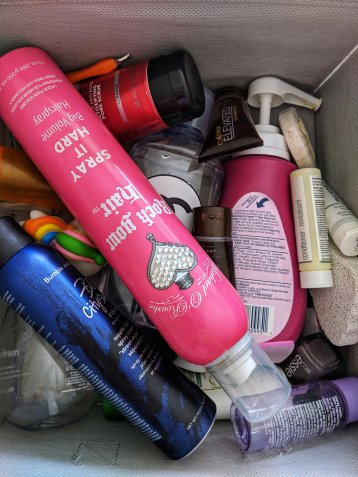 Pull Everything Out
There’s no substitution or shortcut for this step. If you’re finding that you don’t want to pull everything out, that’s usually a pretty good sign that you have quite a bit more than necessary. I say that not to invoke those feelings of shame but so you can store the information as a cue for when you have let too much clutter creep back in. As I discussed above, that’s totally 100% okay. So let’s change our thoughts about it a little and instead of berating ourselves, let’s consider exactly how much we wouldn’t feel bad about pulling out to sort. Whatever amount that is will probably equal all the energy you will ever want to put into maintaining your belongings; use this feeling as a guide for how much you want to keep around going forward… as a moving target – not a finish line.
 Start Categorizing
There is nothing wrong with binning a few things as you pull them out if you already know they’re not for keeps but anything that belongs elsewhere in the house should be set aside until you’re done to avoid getting side-tracked. As you move forward with sorting into keep or toss, try to group things according to similar items or items used in a similar process. After tossing my unused, expired or uninspiring products; I was down to one skincare system. You may end up keeping more, and that’s fine but it’s also not the point. The point is that I grouped it together and put the items together in the order that I apply them. I also put everything I need for a manicure/pedicure in one container; from creams to polishes. Nail cutters, a file, and super glue (I’ll tell this story at the end) went in their own home because I’m not the only one accessing them and they get used more often than the polishes. See where I’m going with this? Brow care got it’s own spot; dental hygiene; razor blades and so on.
Containment

I won’t go into too much detail here because I prefer to use what I already have on hand both at home and when working with a client. Organizing doesn’t have to exist purely in the realm of acrylic/lucite bins. I’m extra lazy so my stuff needs to be simple; I won’t bother putting something away if I have to get past a lid on a regular basis… In general; I use product packaging without. Featured here are boxes from Nespresso product and those little foldable cube bins for cubby shelves. Nothing fancy but maybe one day. Any boxes will do; especially if you cut to size (bonus: wrap with the same paper or paint the front sides of multiple boxes in the same color for unified look).
Details
- Using containers in the same color family is easy on the eye. Boxes in a bunch of different colors will look less organized in general unless the containers are exactly the same size and shape. If I switched my blue cleaning bucket out for a grey one to match my bins; the whole area would instantly look tidier. It’s a weird trick but it works
- Taking time to fold your towels the same way also reduces the number of “things” your eyes see. In addition, you can stack them so that the side with only one fold is visible can boost the streamlined/well-organized look. If this seems daunting; perhaps you haven’t reduced the number of items as far as you can. Give it a second look. At any rate, this concept applies to bath tissue as well; face the seams away from you for a cleaner look if they have to be visible.
- Similarly, face product labels away from you or remove them**, especially if you can easily recognize the item without text. **Disclaimer: do not remove labels from things you aren’t familiar with or if they contain hazardous chemicals. Especially if kiddos can get into it.


After you have everything put back and have attended to the details that really polish a space, you can make note of products you need to replace or remove from your shopping list. Then (and only then, I’d say), you can decide if you need to purchase any containers. Take a picture of the the spot that needs a container (with the items in place; not an empty shelf) and use that photo when making your selection. Please let me know if you have any other great declutter tips for small space. You can also contact me if you’re having trouble tackling your space on your own by emailing findyourmethod@gmail.com or by sending me a dm on Instagram.


Oh, and if you were still wondering about the super glue… I went bowling for my birthday this year and the Physicist nearly ripped off a thumbnail! We super glued it back together and all is well. See you next time on the blog, on Instagram, on Facebook, or on LinkedIn.
